Monday

Clubhouse Jars, Glitter Included.

Working on a new project for the Classroom I decided that we needed a Glitter Jar. We have done a wide variety of Sensory Jars/Bottles in the past, and always have them around the classroom. They are usually a very quick, simple activity and the end result is something that can be used again and again. There is such a wide variety of types of Sensory bottles you can make, it all depends on what the purpose is for the bottle and what materials you are comfortable using with/ for your child.

Since I have a very specific purpose for this sensory bottle, I used a glass jar. It is actually from an old jar of Pasta Sauce (I told you I never throw anything away around here...) and has the lid as well. Lids are definitely required for this to work!

I also wanted a specific color, a deep blue. Back to the food coloring. You know I don't even remember the last time I used food coloring for actual food?

We filled the jar almost halfway with water, and then put some food coloring in.

Then came the corn syrup.
We needed just about the same amount of corn syrup as we had water, and after discussing how thick the corn syrup was and how slowly it came out of the bottle, he decided he had to start squeezing the bottle a little harder.

Then he added the glitter.                    
He took some time to observe how the layers were separated, the corn syrup having settled to the bottom and the glitter floating on top.  

Securing the lid as tightly as possible he mixed it all together 
to see what happens next.

He was clearly impressed.
When everything is settled, the jar looks like this:

Give it a little shake and you have this:
The glitter settles slowly, thanks to the addition of the corn syrup... which is exactly the result I wanted for the project I am working on for the Clubhouse Classroom.

Everything is more fun when you add glitter,
Ms. Liz

Saturday

Clubhouse Goop, It's MAGIC!!

When I taught in a Preschool in Phoenix, making Goop was always a favorite activity. We made it in the sensory table, we made it outside, we made it with glitter, put it in ziploc bags and even used it in dramatic play, can anyone say Goop Soup Kitchen?

The Clubhouse kids hadn't done Goop yet though... until now.

The ingredients are simple.

Water.
Cornstarch.
Food Coloring.


So where does the magic come from?

Honestly, the kids add that part.
Pour corn starch in.

Start with 1 cup of Corn Starch.
FitKid Tip: (*These tips are from the kids, because they know how to do it all, don't they?) "Pat the cup, more stuff comes out."

Next, add food coloring to 1 cup of water.
FitKid Tip: "Add lots of colors!"

Add food coloring to Water.
Sure, why not? We add Red, then we add Blue.. and *presto*, we made Purple water. Whenever using color, be it paint or food coloring or watercolors, there is always room for color blending. Why just use the color Green, when you can have the kids mix Yellow and Blue and see what happens?

Add water to Corn Starch.
Add the water to the corn starch, and then let little hands mix it all together.
FitKid Tip: "I can do it myself!"

This is where all of the Scientific evaluations come in:

"It's slimy!"

"It's soft!"

"It's stuck!!"

Doesn't take long before they start to realize the consistency of Goop. It will flow like liquid when pouring slowly, and yet you can still roll it into a ball. A ball that will "melt" away as soon as you stop rolling. It can get so hard you can crack it, yet it will still flow through your fingertips. Little hands may get sticky, but little brains are processing the way polymers work. Yes, I said polymers.. and I totally looked that up. I don't remember a thing from Chemistry class. The kids had a much better explanation than the Scientific one though,

"This is MAGIC!!"

Wasn't long before we got another FitKid Tip: "Add more colors!" 


So, we do.

                                         
A few drops of food coloring, and you can actually "paint" designs right into the Goop. Our Goop went from Purple, to Blue, to Green.. as fingers swirled around.


The consistency and texture changes that occur as it is touched, along with the changes in color, and the ability to create their own free flowing Art, made this whole process exciting for the kids.

Quite beautiful as well.

Once we added so many colors, and little fingers were done creating their works of Art, we decided to pour the Goop and see if that would mix all of the colors together. Although the Goop had gotten pretty firm while sitting in the container, it still poured freely... to the Oohs and Ahhs of
"We made a Rainbow!"


Once in the cup the kids continued to observe how the colors were still separate and how the Goop they had just poured, was now firm in the cup.

We continued to pour from cup to the original container and then back again, watching colors dance and Goop change. This was one activity that kept everyone's attention for awhile, and although hands may have gotten a little sticky and temporarily color tainted... it was definitely worth the mess.

Speaking of mess, Goop is actually quite easy to clean up. Let the splashes all over your work area dry, and then it will all flake right off in a powdery substance. I left the Goop out all night so the kids could observe the changes in it the next day.

We were left with something you could crack and smash into a powdery substance. Another activity that kept the kids busy for awhile. All I had to do in the end was dust and vacuum.

Now isn't that worth this face?


Here's to making Magic and creating Rainbows,

Ms. Liz


Wednesday

Clubhouse Calendar, Yesterday or Tomorrow?

You know that age where a child refers to anything that happened as something that happened Yesterday, 
and everything they look forward to will be happening Tomorrow? 
Today sometimes just gets lost in the shuffle, 
because isn't it just another Tuesday? 

That is where we're at here at the Clubhouse,
and thus the Calendar Board was born... Yesterday.
When I decided it was time to make the Calendar Board, I headed straight to Preschool / Homeschool blogland! With so many resources available at the click of a mouse, I thoroughly enjoy exploring what is already out there and figuring out how to make it our own. Of course, I also thoroughly enjoy giving credit where credit is due, and I definitely hit the blogland jackpot on this project!

Let's start with the Month, Dates, Days of the Week and Year. All were made readily available to me in perfect printable template form simply by going HERE. Also provided are step by step instructions on how she made her Calendar Board. Good stuff. I knew mine would be different based on the age group I work with, but the instructions and template were thorough and useful, thanks Mama Jenn!

Once I printed out the templates I got to fire up the laminator. You may not know this about me, but I am like a kid at Christmas when it comes to using my laminator. Trust me, if I can laminate it.. I will. If you don't own a laminator, get one. Let me welcome you to this new world of preservation. Come aboard, bring your pouches.

Once everything was laminated and cut, I decided to use velcro dots to affix everything. This option was just better for the Clubhouse kids, who like to pass the days around until they find the right one, and then take turns deciding who gets to change the information out. Sharing and taking turns, every morning. What could be a better way to start the day?

I also liked the Make The Date with coins idea I saw on Mamma Jenn's board, so I added that as well. The kids have recently been intrigued with learning the value of all of the coins, and this allows me to incorporate a little Math lesson every day as well! Again, everything is affixed with velcro dots, which happen to be the perfect size for the back of a coin.

Today, Tomorrow, Yesterday printable templates were found HERE. Thanks, Confessions of a Homeschooler. Changing this around every day (laminated, velcro dots again) has really started to show the kids how maybe, just maybe, not every thing that happened in the past happened yesterday. Sometimes something happened on Wednesday, which was the day before yesterday, right? These are pretty deep concepts for Preschoolers, and this simple template is really helpful in getting them to understand. I love watching their eyes light up as they figure it out. "TOMORROW is FRIDAY?! WOW!!" At age 3, this is some serious knowledge!!

Shape of the Day cards were also an easy find, just click HERE. Thanks, Tls books! They have a wide variety of printable flash cards available, take a look around while you're there.

One of my favorite parts of our Calendar board is the Character Trait we are learning about. Some may think, isn't Preschool a little too early to start discussing Character? To that I respond, how could it ever be too early to start discussing Character? This month is about being Patient. Planting our seeds and understanding that they don't grow overnight is a practice in Patience. Using gentle words like please, thank you, excuse me.. all ways to practice Patience. Having a patient 2 year old may seem like quite a stretch, but when else do we start discussing character if we don't start now? They really do get it. After saying excuse me and not plowing over another child for the newest puzzle in the Classroom, suddenly I hear a Clubhouse Kid exclaim, "I WAS PATIENT!!". I stop, clap, smile and celebrate. Celebrating Patience, now that is a definite highlight in our day.

I got a variety of character traits HERE. Thanks Sarah's Sweeties. Yet again, another blogger who found the time to create printable templates and offer them to blogland at no cost. Talk about positive character traits!

On my own I added a Spanish Word of the Day. I only did the days of the week in Spanish to begin, but perhaps I can give back by designing a template of Spanish words to be shared with whoever may find them useful. Be Patient with me though, I need a few days of the week to get that done.

There you have it.. the Fit Kids Clubhouse Calendar Board. Thanks to everyone who had information to share, I was done with this in just a few evenings. I did run out of laminating pouches though (the horror!) so I will have some laminating to do once I get some more.. which I should probably do yesterday.

Every Day is Fun at the Clubhouse,
Ms. Liz

Monday

Clubhouse Gardeners, Flowers Coming Soon!

While some other parts of the World are covered in Snow, or still awaiting snowfall... the Clubhouse Kids are seeing a break in our Arizona Winter weather and are delighted to head back outside for all of the activities that Spring brings! (Yes, Arizona has Winter weather.. and cold little toes definitely feel it!)

Before we all make a mad dash for the outdoors, we have decided to begin to prep for our Clubhouse garden, which will be definitely getting an upgrade this Spring. We started last year with a few herbs and veggies, but now we are ready to expand! More veggies, more herbs, and a new flower garden! We may not be able to use the flowers for healthy snacks, but we can definitely have fun playing in the dirt to make our Outdoor space even more beautiful!

It's easy to start this process indoors, as long as you are comfortable with a bucket of dirt in the house. The Clubhouse Classroom isn't afraid of a little dirt in the name of Education, so we jumped right in...
A quick trip to our local Ace Hardware Garden Center and I got a variety of seeds and big bag of dirt. No specific dirt required, although I did choose an Organic Soil with Plant Food mixed in there. Egg cartons were easily obtained from our vast collection of recyclable materials that I never throw away (Because you never know when an old pasta sauce jar or packing peanuts are going to come in handy, right?) The egg cartons are of the biodegradable cardboard type, which is essential since they will be getting buried right into the outside garden when transition time comes.


  First we poured all of the seeds into a container so we could talk about what they all looked like, and how they were different. The flowers I randomly chose definitely had a wide variety of seeds differing in size, color and quantity. This is also the part where we discuss how inside of that little seed is a big flower, waiting for the right conditions so it can grow.


The children happened to have perfectly sized hands to fill the egg carton sections with a handful of dirt and then sprinkle the seeds into their new, temporary, little homes. Little fingers made sure the seeds were tucked in tight, with enough dirt to keep them warm as they start their journey.

Since dirt isn't all that our little seeds need to grow, we found a perfect place so they could get plenty of Sunshine and we gave them their first taste of water. The water bottle I used was one that my Son never liked to drink out of because the water always comes out so slowly.. perfect for watering tiny seeds with just the right amount of water droplets!

Now... we wait. It's a good thing Patience is the character trait we are learning about this month because planting a seed and waiting for it to grow is definitely going to require some!!

Checking on the seeds every 4 minutes was how the rest of our day went. The best part being that every time they checked, they excitedly exclaimed "The seeds are growing in there!!", "I can see them getting bigger!!", "Wow, they will sure be flowers SOON!"

Kind of reminds you to look at things through the eyes of a Child ;)

We have a lot of windowsill space in the Clubhouse Classroom and will continue to plant flower, veggie and herb seeds throughout the month of February. Watering them, showing them "love", watching them sprout and grow and tracking their progress, is always a fun addition to daily classroom activities. We've also posted a poem the children love to hear as they water their seeds.


So stay tuned as we plant more seeds (we have A LOT of egg cartons and other biodegradable materials we can plant seeds in) and explore new things to add to our garden. Come Spring we will be transitioning all of our new plant friends outside, and that is sure to be fun!! Perhaps by Mother's Day, every kid will have something pretty he/she grew from a seed that they can take home to Momma :)

Things are always blooming at the Clubhouse...

Ms.Liz

Thursday

Clubhouse Play Doh, Pumpkin Edition

First, I should definitely apologize for the absolute lack of blogging from the Clubhouse. It has been a very busy time, as I'm sure you all understand. I promise I'll get better though. So many activities to share, I will do my best to get it all on here in a timely fashion. Now on to the show...

A fresh batch of Play Dough (a.k.a. Play Doh) gets whipped up here at the Clubhouse every month. The Holiday months are most fun though, when the Play Doh takes on the scents and colors of the Season.

We start with the same basic recipe every time. The recipe is simple, as it should be when working with 2-4 year old children. There is no cooking and no wait time, because seriously, how many Preschoolers do you know who like to wait?
2 Cups Flour
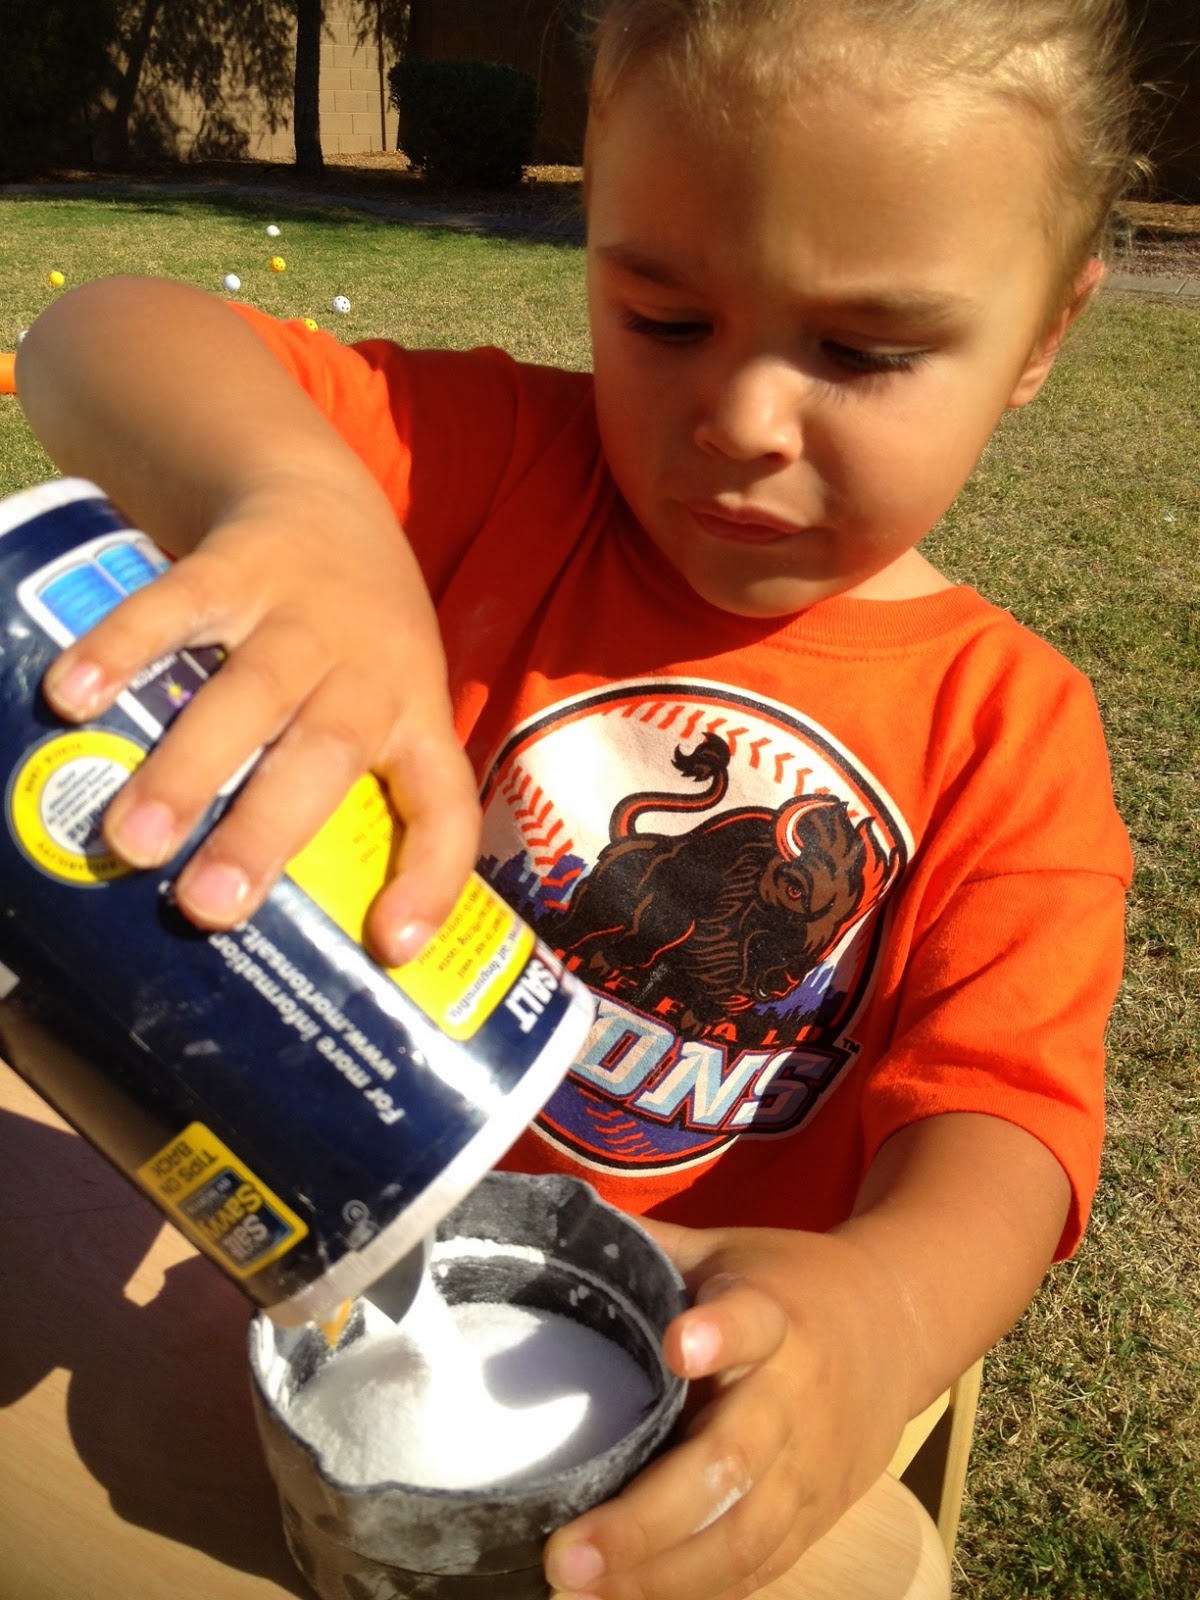
First, 2 Cups of Flour. Letting the kids measure out their ingredients is part of the fun. With all of the ingredients out on the table we discuss. Which one is the Flour? What color is it? What does it feel like? As they are pouring the flour into their big mixing pots we discuss how it is the First ingredient, and First and Flour both start with the same letter, don't they? Which letter is that? Conversation continues as we check the recipe for the Second ingredient, Salt.
1 Cup Salt

The Salt and the Flour are the same Color, aren't they? Do they feel the same though? What's the difference? 
How about Smell? 

As with anything with Preschoolers, learning happens when the child is actively engaged and doesn't even realize he/she is learning at all. At this point we've already done some letter recognition, we've started an order sequence, we've covered a couple of senses as we look, touch, smell and yes, even taste. A little dash of Salt on the tongue, a little taste of Flour after that. Do they taste the same? What's the difference? Does any of this look like Play Doh yet?

We had better move on to the next ingredient then, because the key is in following the recipe, just like following instructions, isn't it? (Always nice to be able to throw in a little lesson on following instructions whenever you can, and not just when instructions are not being followed.)

A large, displayed recipe assists with this part. Easily referenced the kids understand what to do next.


1 Cup Water
Would be nice if the third ingredient started with the letter T and we could continue our little alliteration game, but it doesn't. What letter does it start with? How much of it do we need? Is this ingredient the same as the first 2? How is it different? Again, asking a lot of questions throughout the process and allowing the children to answer is often a better teaching tool than simply stating what they are doing and why. It also makes being the Teacher so much more fun, especially when you hear answers like "The flour is fluffy, but the water is wet." "The salt is like little rocks, the flour is like powder and the water is like slime!" Amazing where young minds draw their comparisons from. Now, on to the next ingredient. Yes, we talk about the letter it begins with again... and this time we introduce a new measuring tool. No longer a cup do we need, but a tablespoon. Does the tablespoon hold more or less than the cup did? That's why we measure, right? What if we put in 1 cup instead of 1 tablespoon, what do you think would happen? (Yes, there is the occasional time a student says "Lets try it!", and so we do. Another teaching tool, letting them make the mistake so they can see what happens when they don't follow a recipe/ instructions.)

1 Tablespoon Oil
Now, the fun part!! This Play Doh was supposed to be Pumpkin Play Doh, wasn't it? Does it smell like Pumpkin yet? Is it the color of a Pumpkin yet? We've got some work to do...

3 drops of each color     
Having Orange food coloring out would be too easy, so instead we have out a variety of colors and we figure out together which 2 colors, once mixed together, will make our creation Orange? How many drops of each color do we use? The recipe says 3, and at this point we know how important it is to follow the recipe! We mix some colors around on the side until we make Orange, and once we realize Yellow and Red do the trick, we add them to the mixing pot. Sometimes it's a tough squeeze, as you can see from my little guy in the picture. Doing it all on their own is part of the process though! Now we start up a little math lesson, because if the recipe says 3 drops of each color, and we have two colors, how many drops are we going to put in total? A lot of out loud counting takes place here, usually on little fingers. Who needs a calculator, aren't fingers the best way to complete a Math problem?

Sprinkle "Special Seasonings"
Now it's time for the sprinkling of "Special Seasonings". In this batch, we're going for Pumpkin.. so now it's time to put those little noses to use! Yes, I have Pumpkin Pie Spice out on the table, along with Cinnamon, Nutmeg and All Spice. There's also Pepper, Garlic powder and Dried Basil. Which of these smell like you would put them into Pumpkin Pie? Immediately the Pepper, Garlic and Basil are eliminated. Even the youngest chef knows that those ingredients do not belong in a Pumpkin Pie. The nose is a powerful sense, especially when you're 3 years old and not afraid to use it!

Time for mixing!! We have a variety of utensils we use for this, but inevitably little hands want to get in there and do the work. Hey, I said this was a simple process, I never said it wasn't a messy one. At this age learning is supposed to be hands on, messy and a lot of fun! Besides, I have been known to make some pretty big messes with all of these very same ingredients, I just call it cooking.

As the mixing continues, so does the conversation. What's happening as we mix it? What does it feel like? Work those little hands!!

Sometimes at this point, the kids are so focused, elbow deep in their concoctions, that I simply watch... and listen to the grunting that is apparently required when you're properly kneading dough. Then suddenly, VOILA...!
 
Perfect batch of Pumpkin Play Doh, and a very happy Preschooler. Makes a pretty big batch, doesn't it? Changing this recipe to make it something new is easy. Change up the "Special Seasonings" with just about anything you have in your spice collection. Change the color. Alter the recipe amounts accordingly so that everyone is making smaller batches, and then let them simply pick what they want theirs to look and smell like. Purple Play Doh that smells like Garlic? Um, sure.. why not? The point is, they are learning, they are engaged, and they create something that we actually get to play with!


 Squishing, rolling, making balls, worms, pancakes and towers. The fun from here is endless. Well, as endless as a Preschool attention span allows. Add rolling pins, cookie cutters, etc.. and watch their imaginations bring the Play Doh to life!


When they move on to their next activity, place their Play Doh in a sealed Tupperware type container and it will be ready to play with again and again. If it gets a little "sticky" as time goes by, simply roll it around in a little flour. We've been using our batch all month. As a matter of fact, it's just about time for December's batches.. Cinnamon Play Doh and Pine Tree Play Doh. Play Doh making is always anticipated around the Clubhouse, for both teacher and students. Hopefully you can enjoy this simple recipe at home and come up with a few concoctions all your own. I guarantee you'll come up with something not available in stores, and your kids will love it!!

Simple Play Dough
  • 2 Cups Flour
  • 1 Cup Salt
  • 1 Cup Water
  • 1 Tablespoon Oil
  • Color/s of your choice 
  • Sprinkle of your selected "Special Seasonings"
Let little hands mix it all together, and Enjoy!!